GIMP is a fantastic, open-source photo-editing and graphics program. Unfortunately, it can be a little confusing to use. Recently, I wanted to edit some photos and change the background quickly and easily. The easiest way to do that is to erase to transparency (with a white background behind). But my photos were jpegs, which don’t have any transparency. What to do? Here is what I did. (This presumes a basic understanding of how to use GIMP.)
{Disclaimer: I am not a graphics design professional, and this is just what works for me. You may have a better way of doing this. If you don’t, I hope this helps but I make no promises.}
- Open your jpeg file.
- Save the file as an xcf file {GIMP’s native file format that supports transparency}.
- Open the layers dialog. Windows –> Dockable Dialogs –> Layers
- Now, add an alpha channel (transparency) to the Background layer. {Quick tip I read in a GIMP discussion board: Any layer without transparency, i.e. has no alpha channel, will have its name in bold in the layers dialog box.} Layers –> Transparency –> Add Alpha Channel
- Rename the original layer {I like to use Foreground} by double-clicking the layer name in the dialog box and typing in the new name. Be sure to hit return to save the changes before clicking away.
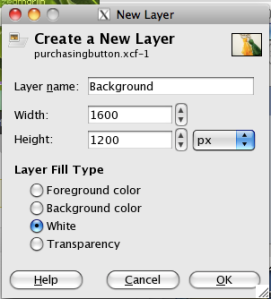
- Then click the new layer button in the dialog box to add a new layer.
- Name the new layer Background and select it to be White.
- Shift the new Background layer to the bottom by clicking the green down arrow.
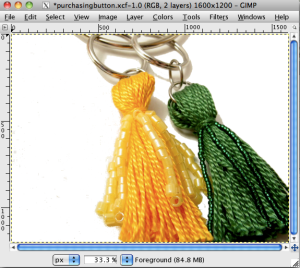
- Click the Foreground layer so you are working in it, and with the Fuzzy Select tool, select part of the background you would like to be white. Shift-click to select the whole area, if necessary.
- Set the foreground color to white, and choose the bucket fill tool. Set mode to Color Erase, and set to Fill the Whole Selection. This will erase your background to transparency.
- Repeat steps 9 & 10 for the rest of the background.
- Change the bucket fill settings back to Normal, then repeat steps 9 & 10 for the background as necessary to replace any areas with leftover color.
- Clean up edges and lingering rough spots with the pencil, paintbrush, and airbrush tools as necessary.
Related Articles
- Add transparency in gimp (zeusville.wordpress.com)
- GIMP: Overview (desight.wordpress.com)


